Virtual recordings can be a nightmare! We all remember connecting with a top speaker only to find out our microphone did not work. Well, let’s try to avoid that. If you are planning to record a podcast in our studio with a virtual guest, make sure to follow this step-by-step guide for a great podcast.
At Uber Flix Studio, we built a fully automated podcast studio for all podcasting needs. We won’t be there when you record, but you will have everything you need to make a great podcast easily.
1. Connect Your Laptop
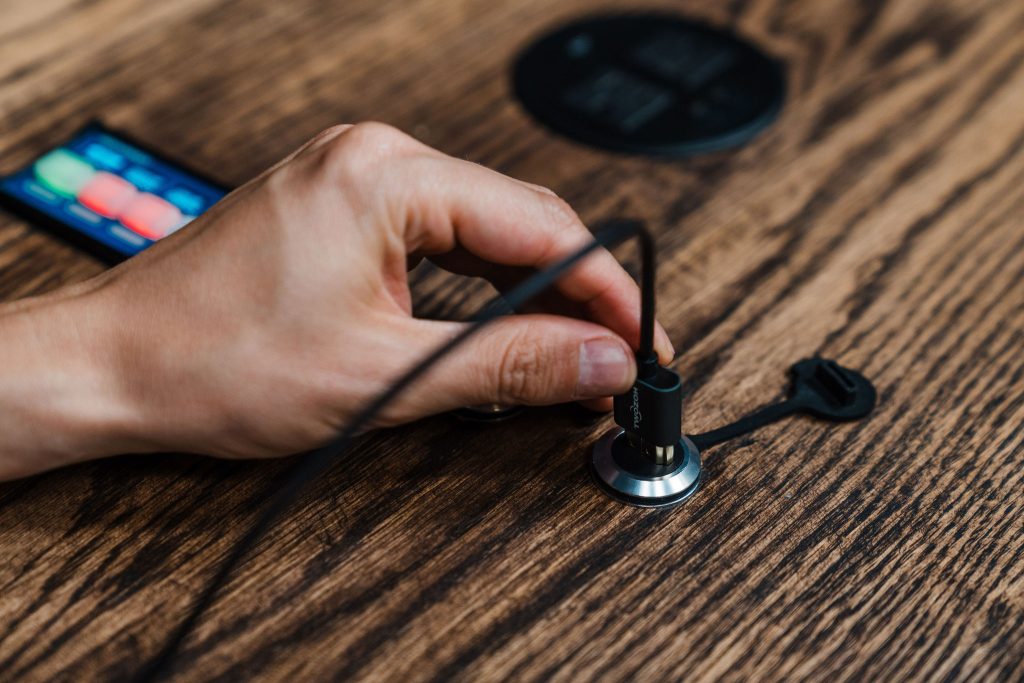
When you enter the studio, sit at the left side of the table and locate the controller. Right next to it, you will see an HDMI port and a USB port.
Look behind you on the shelf to locate on basket of wires. Find the HDMI and USB cables and use them to connect your laptop to our two ports on the table
For your convenience, we also have USB to USB-C cables.
2. Select our Speaker and Microphone
Before getting into which virtual meeting tool is best, let’s make sure that you select our studio microphone and speakers.
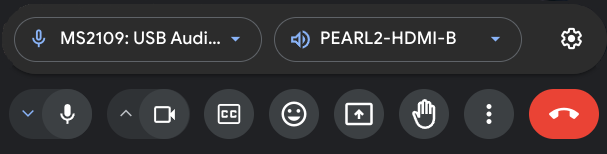
The first thing to do is select our USB digital microphone (it may also appear as MS2109) in your virtual meeting room and then select Pearl2-HDMI-B for your speakers. Effectively, this will make your laptop an extension of our studio. Your virtual guests will hear you through our microphones and you will hear them through our headsets.
3. Record Separate Tracks
It is important to record all tracks separately, otherwise, we may hear your guest twice with a bad feedback effect. The precise steps will depend on which tool you are using. If you scroll down, you will also see our thoughts on commercially available virtual recording options.
Zoom
To record separate audio tracks in Zoom, follow these steps:
- Open Zoom and go to Settings.
- Select the Recording tab.
- Check the option labeled Record a separate audio file for each participant.
This will ensure that each participant’s audio is saved on a separate track, simplifying editing later on. After the meeting ends, Zoom will save each track as a distinct file in the recording folder.
Pro Tips for Uzing Zoom When Recording a Podcast
- Download the Zoom App: There are many more features on the Zoom App than on the Browser version. If you want to record a high-quality podcast, you are going to need the full spectrum of features.
- Enable HD for Your Guest: In Zoom settings, ensure HD video is enabled for your guest. This will enhance the video quality of your recording. You may also want to appear in HD yourself, but this is much less important given that we will capture you from our cameras in the studio.
- Check ‘Touch Up My Appearance’: This Zoom feature subtly improves your video quality, giving you and your guest a more polished look on camera.
- Hide Self-View: Once your camera is set, hide your video feed so you can focus entirely on your guest without distractions. What you want is to show your guest in full screen mode without anything else to distract the viewer.
- Decide Between Display Extension or Mirroring: When using your laptop in the studio, choose whether you want to extend your display (spread content over multiple screens) or mirror it (same content on both screens) depending on your needs.
- Pin the Guest and Select Full-Screen Mode: Ensure your guest’s video is pinned, and select full-screen mode to capture a clean, professional shot of them.
- Optimize Video Settings: In Zoom’s video settings under ‘General,’ enable dual screens. Pin the guest to either Screen 1 or Screen 2, depending on your setup.
- Final Pin Setup: Select the guest’s video, pin it to the screen with the best display quality, and make it full screen to ensure optimal video capture.
Riverside.fm
To record in separate tracks on Riverside.fm, follow these steps:
- Start a New Recording Session: Once logged in, create or join a session.
- Automatic Separate Tracks: Riverside.fm automatically records each participant’s audio and video in separate tracks.
- Post-Recording Access: After the session, you’ll be able to download each participant’s track individually from the recording dashboard, ensuring easier editing.
Riverside’s platform handles this process automatically, so no additional settings need to be adjusted for separate tracks.
Zencastr
To record separate tracks on Zencastr, follow these steps:
- Create a New Recording Session: Log into Zencastr and create or join a new session.
- Automatic Separate Track Recording: Zencastr automatically records each participant’s audio (and video if enabled) in separate tracks locally.
- Post-Recording Access: Once the session ends, the files are uploaded to the cloud. You can then download each participant’s track individually for editing.
Zencastr ensures high-quality recordings, capturing locally and avoiding internet-related audio issues.
Selecting Your Virtual Meeting Tool
When recording virtual meetings in Uber Flix’s automated podcast studio, it’s crucial to choose the right tool that aligns with our setup. Your selected platform should support recording separate audio and video tracks for hosts and guests, ensuring smooth post-production editing and seamless integration with our studio’s technology. Below are three highly compatible options—Riverside.fm, Zoom, and Zencastr—each providing unique advantages for high-quality remote recordings while allowing clients to display guest videos on the studio’s TV via HDMI. Let’s explore these options in detail.
1. Riverside.fm
Riverside.fm is our top recommendation for all our clients. This virtual recording machine is designed for podcasters and offers high-quality video and audio recording, making it a perfect choice for your studio setup. It records locally on both the host and guest sides, ensuring separate high-quality audio and video tracks for easy editing. This means clients won’t face the hassle of cleaning up a single audio track, a crucial feature given that you require separate tracks for both the host and guest. Additionally, Riverside allows the guest’s video to be captured in full screen, which integrates well with your studio’s HDMI connection for seamless live display on the studio’s TV. The platform is user-friendly, making it perfect for a self-serve studio.
It is not particularly expensive, but it is certainly not the cheapest option. However, if you are planning on delivering a high volume of quality content, we recommend Riverside.fm for its user-friendliness and automatic audio track split.
2. Zoom with Local Recording
While Zoom is more general-purpose, it remains one of the best options because of its stability and ease of use. Let’s be clear though, Zoom was not meant for podcasters. It doesn’t mean it won’t do the job, but it will seriously limit the overall quality of your video.
The good news is that Zoom offers a “record separate audio files for each participant” feature, allowing for straightforward post-production. You also can “spotlight” your guests, making their screen the main view, which works well when connected to the studio’s HDMI for TV display. Zoom’s flexibility and widespread familiarity make it a solid choice, especially for clients who might be new to recording remote interviews.
3. Zencastr
Zencastr is another excellent platform for podcasters, offering the ability to record separate audio tracks for each guest and host. It records locally and uploads high-quality audio and video to the cloud. This eliminates the issue of a bad internet connection affecting the recording, as everything is captured locally in pristine condition.
Like Riverside, Zencastr integrates well with our setup, allowing the guest’s video to be shown full screen on your studio’s display via HDMI. Its user-friendly interface and minimal learning curve make it a good fit for self-serve clients.
Comparing Monthly Costs:
- Zencastr: Free, $20 (Creator), $40 (Professional).
- Zoom: Free, $14.99 (Pro), $19.99 (Business).
- Riverside.fm: Free, $19 (Standard), $29 (Pro).
Key Recommendations for Clients:
- Full-Screen Guest Display: Ensure that the virtual meeting software is set to show your guest in full-screen mode on your laptop. This helps maximize the visual quality of the live feed on the studio’s TV.
- Separate Audio Tracks: Always configure the meeting software to record separate audio tracks for each participant. This ensures easier post-production editing and avoids mixing both voices onto a single track.
- Laptop Integration: Be prepared to connect your laptop to the studio’s equipment using the provided HDMI and USB cables. This will allow the meeting to seamlessly integrate with our professional setup.
By using these platforms, clients will ensure a smooth recording experience and minimize the risk of editing complications.
If you have other questions about our studio, don’t hesitate to send us an email at

Pierre Bussières is Editor of Uber Optimized, Director of Sales with JeemanGo Podcasts, and Editor in Chief of Hoppy History. He writes on alcohol markets, beer history, and disruptive technologies. He previously wrote for Global Risk Insights, the Diplomat, Reflets, La Montagne des Dieux, the NATO Association of Canada, Diplomatie, and Le Temps d’une Bière.